Shortly after planning the three crossings that make up the PRR/N&W interlocking, I discovered that the section of the N&W that I thought was straight, wasn’t. The problem was that the easements of the curves at either end of the straight were creeping in, so both ends of the straight were actually a very slight curve.
My takeaway from this discovery was that while spline roadbed can be allowed to make its own spiral easements in most cases, in other cases specific ROW locations need to be enforced. I didn’t do that when building this section, so I was forced to retrofit the correct alignment.
In the image above, the two-foot straight edge illustrates the slight bend. To fix it and avoid building a crossing across a curve, I decided to reposition the curves on either end and shorten the spirals. This ended up affecting about ten feet of track.
My first attempt was to leave the apex of the curves in the same place but broaden the curve’s exit, which lead to a shorter spiral. I used the bent-stick approach for this. The image above shows a 30″ radius curve template sitting partially in the fixed radius part of the curve, with the rail easing away from the fixed radius between the second and third hole in the template. From this image, you can see the easement is long and quite lazy about getting to tangent (it made for really smooth running though).
I wasn’t happy with this solution because it led to too many radii within one curve, so instead I chose to push the apex of the curve toward the center of the right of way about an inch, extended the 30″ radius arc a bit further, and used an spiral that was about 8″ shorter. Effectively, this made the curve more “square” – starting later and ending sooner.
The result of those changes lengthened the straight about 6″ on the left end, and applying the same approach at the right end of the tangent found another 8″.
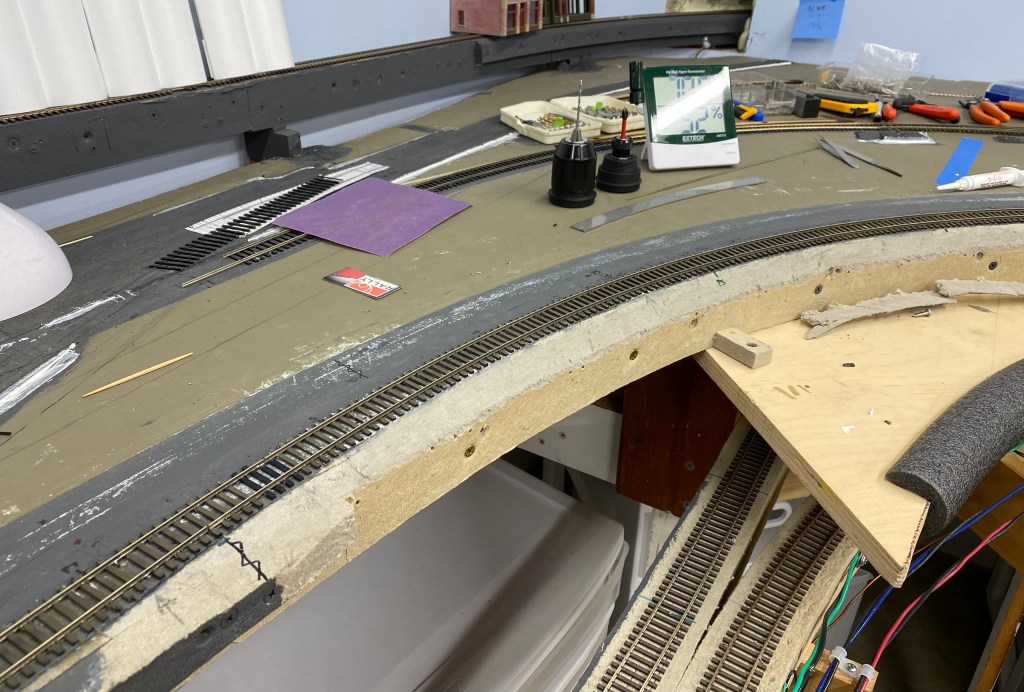
The photo above shows the result of the changes on the right end. The offset of the tangent and the 30″ curve radius is about 3/4″, down from about 2″ with the lazy spirals. The length of the spirals is around 18″, which feels right.
Looking closely at the photo above, you can see the original and new point of tangent and the new spiral point marked on the ballast shoulder.
The new alignment of the straight is a full two feet long, which puts the crossing in a much better position. The Sharpies point to the original ends of the straight for comparison. Notice the gap in the rail – the realignment also increased my length of run by an inch!
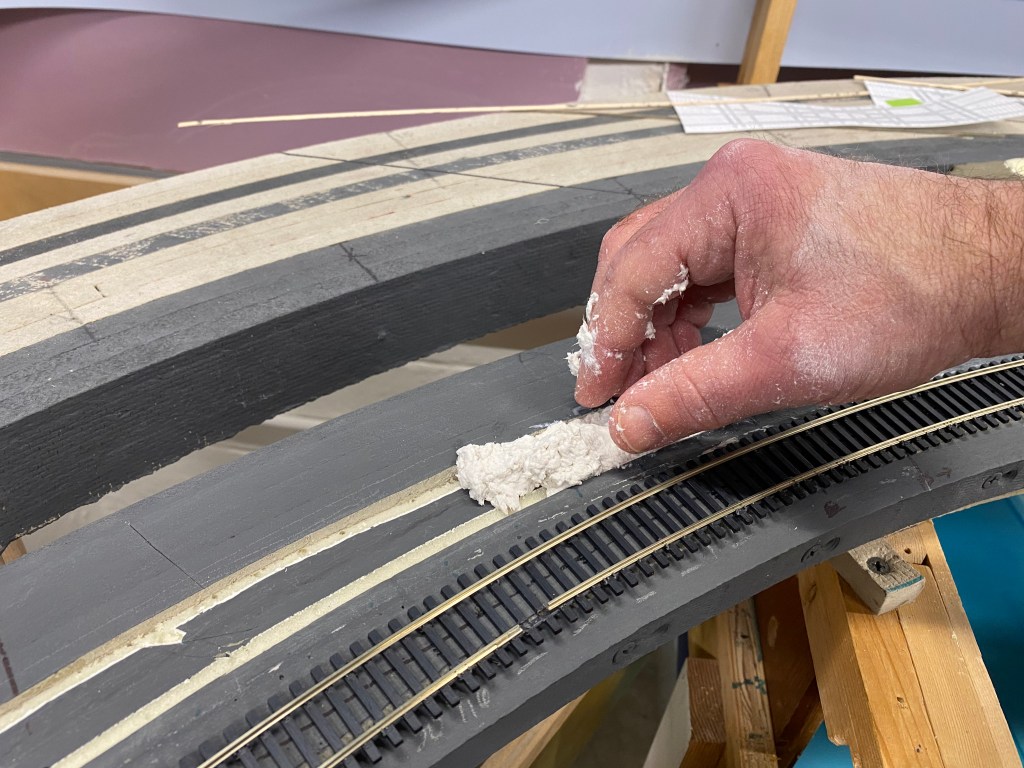
Squaring off the curves (as the racers would say) made the new track alignment cross a depression in the center of the roadbed that represented the ballast profile between the two tracks. I had to fill that in to provide a foundation for the new alignment (and as I later learned, a center “ditch” isn’t prototypical anyway). My wife and I cut out some of the foam that formed the center profile, filled it with Sculptamold, and repainted it in my base “cinder” color.
This image does a good job of showing how much the curve moved outward compared to the light-colored line that is an artifact of the old alignment. That movement exposed almost an inch of the roadbed at the apex of the curve and required some rework to remove the excess material and regain my ballast shoulder.
I removed the existing ballast shoulder (a separate piece of Homasote screwed to the side of the spline) and cut away unneeded material with my favorite Homasote-working tool – an oscillating saw with a metal cutting blade. I eyeballed the angle, and it worked out pretty well. Including cleanup, it took about ten minutes per side.
All that’s left now is to repaint the new ballast shoulder, then it’s on to building the three crossings!
Thanks for reading my blog. If you have any questions or additions, please share a comment in the section below. If you know others that might be interested in this blog, feel free to share the link.
My model railroading interests are firmly anchored in the steam era. After reflecting on why that is, I found that there really could have been no other outcome, given my upbringing.
The Age of Influence
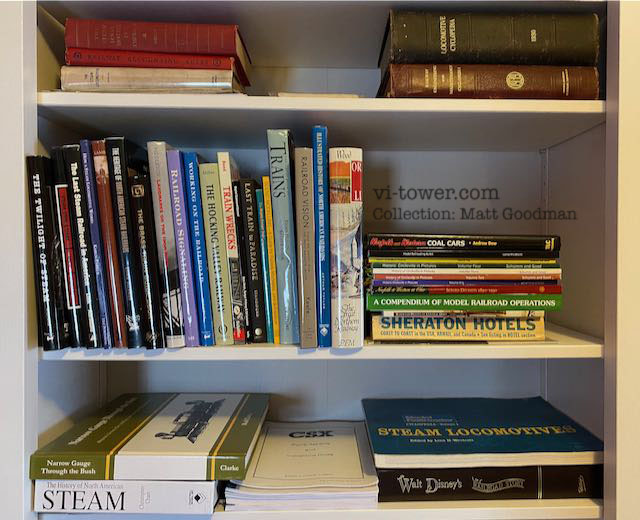
I was a voracious reader when I was young, and read (or at least flipped through) about every book in my childhood home. Many of them were either history or railroad-related books that my father collected, and the majority of those were written between the late forties and early sixties by a variety of authors, both well-known (Beebe, Clegg) and less so.
The topics or themes in his collection ranged from histories (Narrow Gauge Through the Rockies, Steel Rails to Victory) to historically romantic (The Twilight of Steam, Railroad Wrecks) to motive power (Pennsy Power 1&2). Some books were written even earlier in the century for the railroad industry. Locomotive and Maintenance Cyclopedias from various years are good examples of those.
My personal collection – with some of dad’s on loan. As his collection dwarfs mine, I have little reason to buy many of my own!
The one thing that almost all of the books had in common was that they were focused on railroads, trains and locomotion during the steam era.
Under the influence of these artifacts, I remember being frankly astonished that the railroads would give up the obviously superior steam power for *diesels*. Furthermore, I found photos of steam locomotives being scrapped heart-rending and misguided.
The Age of Exposure to the Real Thing
During this influential time, when I was six or seven, dad came home with a steam engine – literally. He and two friends (Jerry Ballard and Lanny McCaulley) decided they wanted to establish a steam-powered scenic railroad. To that end, they had sourced #33 – a heavy 2-8-0 built in 1916 for the LS&I – from Marquette, Michigan. The locomotive was hauled on its own wheels to Columbus about 1971 and parked on the “Mud track” in the C&O’s Yard A – just west of where today’s Huntington Park is.
The locomotive was in good mechanical condition and had had very little time on new flues when she was retired about 1960. My memory was that its “restoration” in Yard A consisted of relatively minor tasks; new sheet metal, paint, and general renewal-type work (there was also coach restoration going on).
#33 at Yard A’s “Mud Track”, with two ex-Erie commuter coaches. Notice the Franklin tender booster. Columbus, 1971. Photo by Dick Argo
Dad often took my brother and I along to “help” and (probably) to get us out of mom’s hair. I don’t remember much of what I helped with – save one day when we were put to work mixing “mud” in a wheelbarrow. Once this cement-colored insulation material was thoroughly hand-mixed with water, it was applied to #33’s cylinders before the sheet metal wrapper was re-attached. Back in the steam days, insulation mud contained asbestos – to this day, I wonder if the mud we mixed did!
Eventually, because somebody knew somebody, the locomotive was moved to a stall in the C&O’s Parsons Yard roundhouse. Now THAT was cool. I did some gopher work there, but honestly spent most of my time just hanging out.
By this time, being around a steam locomotive (and the railroad more generally) was normal. Climbing into the cab, smokebox and between the frame rails was old-hat. My brother and I would occasionally wander through the rest of the roundhouse. As this was usually after hours, there weren’t many railroad employees around to yell at us. Every now and then, there would be a diesel with it’s hood off being serviced in one of the stalls with high-level work platforms – I would scoff at this inferior form of motive power!
On the turntable at the C&O’s Parson’s Yard, ca. 1974. Photo by Dave Dupler (davedupler.com)
One day there was word that the C&O was short on power, and the railroad asked dad or Jerry if #33 was ready for pusher service up Powell Hill! From my perspective, this was a great opportunity to show what a REAL locomotive could do!
For whatever reason, the event never happened – to this kid’s enormous disappointment. I vaguely recall dad telling me that #33 would have been too slow for the work. One thing is sure, it would have been a very interesting movement!
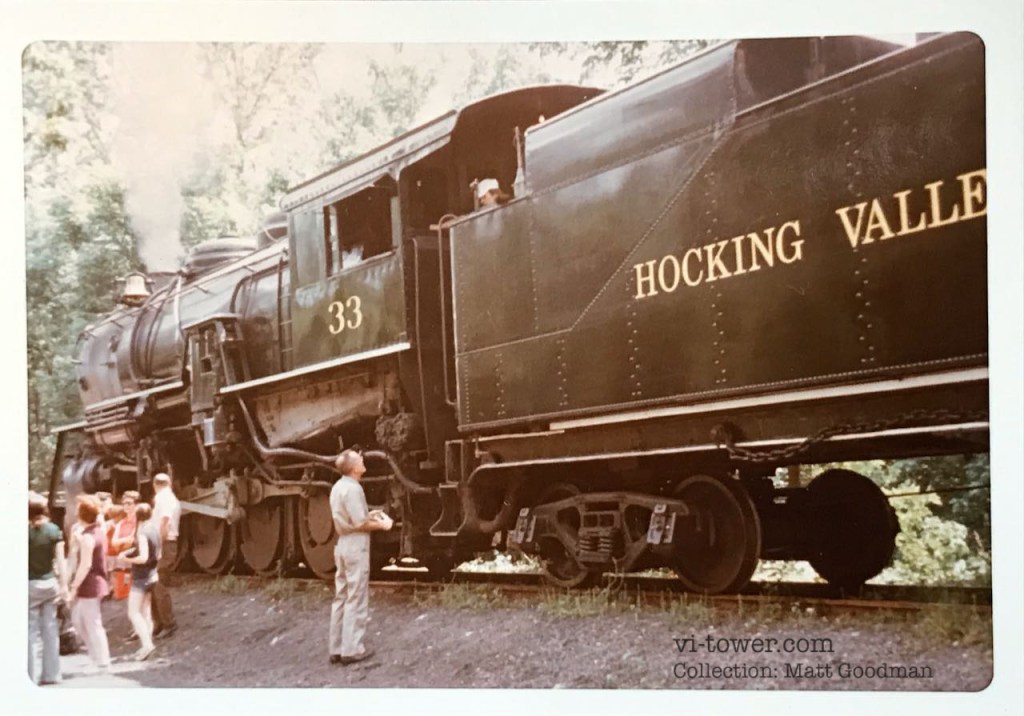
Up and Running in Nelsonville, Ohio
After initially trying to acquire a line into Wellston for the scenic railroad (which was to be named the Salt Creek Railroad), the Hocking Valley Scenic was established in Nelsonville, running up the Monday Creek branch to New Straitsville, recently abandoned by the C&O. This line is relatively flat, with modest curvature, and originally served many mines. However, the rail was light (67-90 pounds), ties were in poor condition and the track structure was generally anchored by cinders and weeds. Not many railroads looked good in the early seventies; so as far as I was concerned, this look was “normal”.
#33 transported herself down to Nelsonville at the start of the first and second seasons, using the C&O (now I&O) main. It was fun watching #33 run alongside Route 33 at about 30 mph. It was a clank-clonking cacophony! I would have loved to ride the cab during one of these trips – I’m sure the crew was quite active keeping up with the steam usage during this long, sustained speed trip.
The first year of the railroad’s operations was a bit like primitive camping. The “ticket” booth was a tarp strung between two trees and the surface of the parking lot was solid cinder recently reclaimed from a forest (via my uncle’s bulldozer). Cinder makes a nice surface when its dry, but is very messy when wet. The following year, the tarp was replaced by a small watchman’s shanty for the ticket booth, then later by a railroad target office from the HV/Pennsy crossing in Lancaster. That one was big enough to include a souvenir counter, which I sometimes manned.
Longstreth “Terminal”. Dad is on the left, by one of the motor car trailer
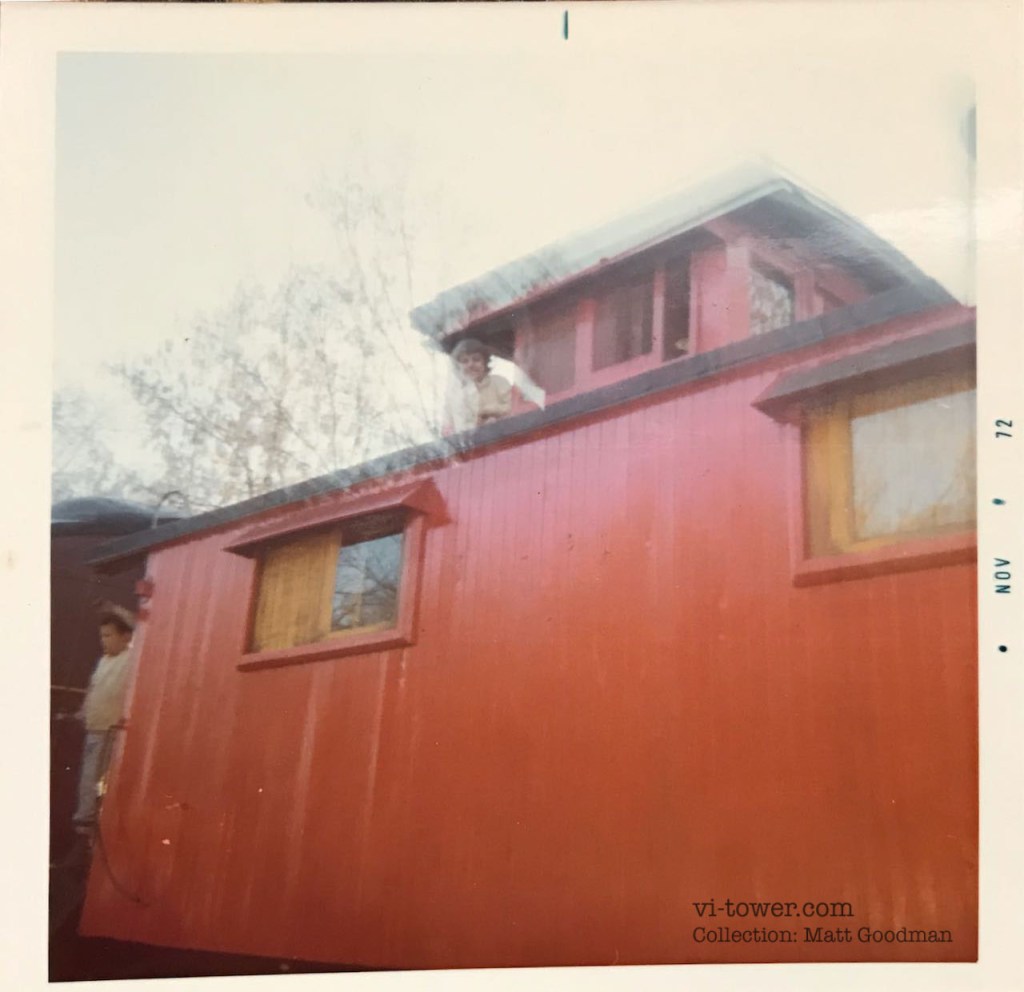
At that time, #33 was stored in Longstreth between weekends, where she was re-coaled using an ancient conveyor (water was taken from a hydrant at Bessemer). My brother and I would sometimes spend the whole weekend down in the hills, overnighting in the cupola of the caboose, which we were both still short enough to lay down in. There’s nothing like waking up to a light scent of coal smoke and the sound of the locomotive’s dynamo and blower running as steam pressure is brought up! Those mornings still stick with me.
Dad re-coaling #33
My overnight accommodations
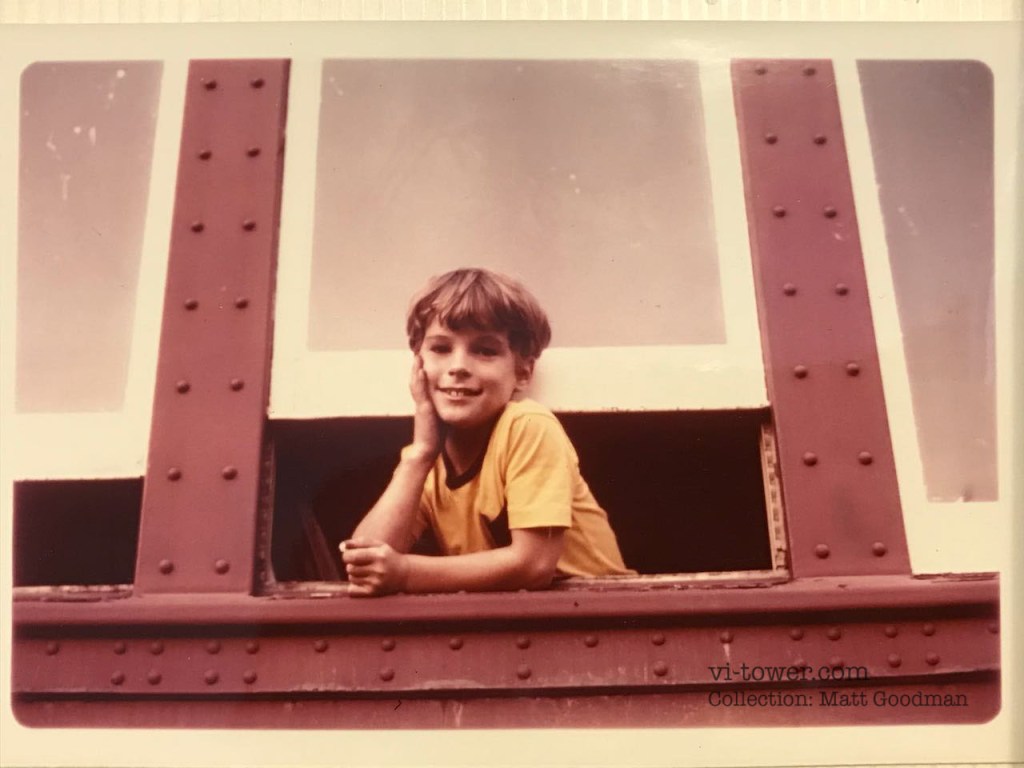
A typical day on the railroad – climbing on a steam locomotive.
Snapshots from Longstreth in the early seventies, probably taken by my mom. Cameras sure have come a long way!
The local Longstreth kids were attracted by the activity, and would sometimes stop by to help out or socialize. Many of them rode around on four-stroke Honda mini bikes. Man, was I jealous of their freedom and having all of the hills to ride in (motorcycling is one of my other hobbies).
Sounds and Smells
During those early years, I spent one or two trips per day riding in the cab of #33 when dad was firing. I remember these experiences like they were last year – not forty five years ago! These experiences are what made steam really get under my skin.
Put on your sensory imagination cap, and I’ll attempt to describe what I saw, heard and smell. I encourage the reader to try to duplicate the sounds – out loud!
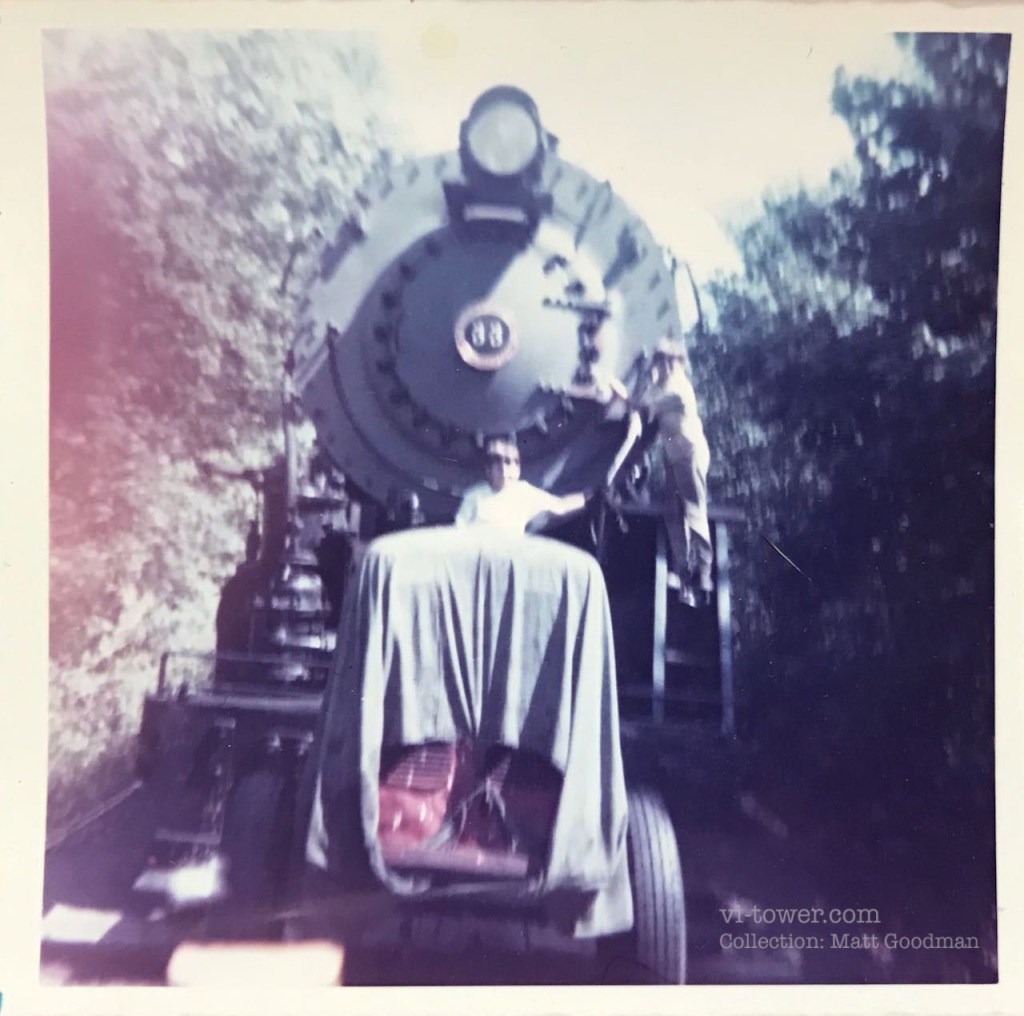
#33 looked especially burly from behind and below, as in this photo taken at the Nelsonville end of the line. That’s my grandfather standing at the foot of the tender, and my mom in the cab (with white hat). By this time, the Franklin tender booster had been removed and sold for scrap.
Standing – Steam locomotives are relatively silent while at rest (when compared to an idling diesel). Some sounds were there all the time – like the buzzing whine of the dynamo (the small steam-powered turbine used to generate electricity) and the rhythmic “ssss-chunk-CHUNK, chunk-CHUNK, chunk-CHUNK” of the cross-compound air pump. The feed water heater’s pump made similar sounds, though slower and accompanied by a bit of spitting/fizzing from steam and water getting past the packings.
If required, someone would make the rounds with an alemite gun to force grease into the rod journals. It made a loud “CHI-CHI, CHI-CHI, CHI-CHI” air-exhaust sound. Then there was the occasional, ear-splitting hissing-ROAR of a lifting safety valve. This would occur without warning and would scare the pants off me! Fully opening the drain valve on a pressurized air tank is a good comparison – but with a lot more bass and volume!
Starting – Before starting, someone would begin ringing the bell manually (sometimes my job!) or with the air-powered automatic ringer. #33’s ringer was a single-action device that swung the entire rocker, not just the clapper, so it had a more natural ringing frequency than the fast ding-ding-ding of the clapper type. The air-ringer would make a “pi-sssit” with each rocker swing – and each swing would create two dings.
After whistling off (two toots), releasing the train brake (PPSSSssshhhhhhhh), and moving the reversing lever forward (“SSSHHHHHhhhhh” from the power-reverser), the engineer would give a tug on the throttle. With a good engineer, steam starts are dead silent and very smooth – so gentle that I had to watch the ground from the cab window to see if we were moving. Math tells me that we could travel up to three and a half feet before the first exhaust was heard. Then, a gentle “Wuff”. Overlaid on these sounds was the sound of the steam escaping from cylinder cocks (“SHHHH………. SHHHH…….. SHHHH…. SHHHH” – in time with the quickening driver rotation) accompanied by a plume of energetic steam angling up and back about twenty feet before dissipating. On chilly mornings, the steam would hang in the air much longer, a very cool (and slightly eerie) effect.
Underway – When accelerating from a stop, #33 had a side-to-side waddle. The location of the cab behind last axle and the view along the side of the boiler accentuated the movement. Similarly, when the locomotive was traveling over uneven track (i.e., the whole railroad), the cab would wag left, right, up and down. That movement was accompanied by the sound of the floor apron scraping back and forth across the tender deck and the groaning and popping of suspension bits, flanges and rail as they protested the abuse.
Whenever in motion – but especially when drifting backward into the station on the return trip – the rods would make a terrific sound – a “clank-clonk-clong-bong” – with every driving wheel revolution. Sometimes it sounded like parts were about to fall off!
Grade crossings got both a ringing bell and wonderful whistling. Jerry’s son would sometimes get to blow the whistle at one private crossing, but I don’t ever remember having that opportunity – maybe I should have asked! I think the whistle was a three-chime. Whatever it was, it sure was pretty.
Firing – Firing was a grand mix of sounds, smells and other non-visual sensations. Dad usually hand-fired the locomotive; it had a stoker, but it was rarely used.
When firing, there would first be the sound of his shovel scraping the deck at the coal gate, followed by an air hiss and loose, heavy clanking of the fire door opening when he stepped on the pedal of the automatic (air powered) opener. That was followed by a flat ”zhiiing” of the coal sliding off the shovel into the firebox, then another hiss and loud “CLANK-clank” as the door slammed shut and rebounded.
When the stoker was used, it made a grinding/crunching sound as the coal was crushed and moved to the the stoker’s distributing plate. If the fire door was open (HOT!), I could watch the distributing jets fling the coal from the plate into the red-orange abyss – this made a stuttering hissing sound.
Whether firing manually or with the stoker, dad would open the door manually to check the fire. He always said to “fire the bright spots” – the brightness indicated that the fire was getting thin at those points.
Adding water – #33 had two ways of putting water into the boiler; a feedwater heater (used only when underway) and an injector, which was typically only used when standing.
I distinctly remember the injector because of the dance required to use it, and the sounds it made. First, dad would pull down on a large brass handle mounted on the backhead, then crank open a valve below the fireman-side seat box. While his hands were still under the seat box, he would would hang his head outside the cab window (dog-like) to watch the injector overflow just above track level. When water started gushing out of the overflow, he would close the underseat valve, then stand up and pull the injector handle all the way down (at least, that how I remember it). I vaguely remember the sound of the water working its way up the pipe, a mix of gurgle and rushing sounds that increased in pitch as the pipe filled (think of the sound a slide flute makes), then it would stabilize into a steady metallic rushing sound.
When enough water was in, he’d shut the injector handle, which was accompanied by a water-hammer like “CLANK”, followed by a temporary gush of water down at the overflow.
Smells – I’ve read that smells cement memories better than any other sense, and based on my experience on the locomotive, it’s absolutely true. When starting, I would get a nose full of smells – a wet coal smoke smell from the stack, a steam-oil steamy smell from the cylinder cocks and exhaust and a straight saturated steam smell from various water/steam appliances (injector drain, dynamo, whistle, etc.). Alemite grease for the rod journals had it’s own unique smell, as did the car oil used in the journal boxes.
It Sticks With You!
So, given the above described sensory immersion at that young age, how could I *not* have a penchant for steam locomotion?
If you ever see me listening to a sound-equipped locomotive model with a look of fierce concentration on my face – or if I ever comment on or critique the sound that the model is making, you’ll now have a sense of what’s going through my head.
Thanks for reading my blog. If you have any questions or additions, please share a comment in the section below. If you know others that might be interested in this blog, feel free to share the link.
Everyone knows that there is nothing that focuses you on work that needs to be done like a deadline. My deadline was an upcoming neighborhood home and garden tour on which our house was one of the destinations.
We had agreed to be on this year’s tour more than a year ago. The main feature of our home, the one that prompted the tour organizers to recruit us, was our rooftop solar array – a feature that is not common in Central Ohio and is virtually unknown in my neighborhood. One component of that system is the inverter, and our inverter is in our basement. Given that the layout is also in the basement, it would unavoidably also be on display and I decided that this was as good a time as any to “out” myself as the guy in the neighborhood that builds models. And that meant the work that needed to be done by the deadline was getting the layout in presentable condition.
I had been making steady progress on the layout before and since we committed to the tour – but with little haste and no definition of “done” (i.e., no goal). Left to my own devices, I would have been happy to have a static train displayed on dead track in front of a building mockup, but my better half would have none of that. Trains had to run and those trains had to be moved by steam locomotives with their visually interesting running gear. Inspired by her resolve, around the first of the year I set the following goals for the tour:
Trains running on a continuous loop
Fascia, a scenic base and skirting installed along the length of Circleville
At least one semi-finished scene to give a sense of what the future miniature reality would look like
Between the time I set the goals early in the year and the end of April, I had completed the track work (with some concessions to expedite the work) and most of the needed wiring. This took longer than expected, partly due to the effort of working out the wiring logic, but largely due to work travel interruptions. With incomplete wiring, no running trains and zero scenery, the deadline was starting to look imposing at the beginning of May.
With the help of my wife, we mapped out what we needed to do to get the remaining work accomplished. One big change was the use of the “we” word – I began recruiting friends and family. The other change was simply her keeping me on task – she sent me to the basement virtually every evening to get something done. The nature of the work also started to change, moving toward more finish-type work, which is easier to delegate out to multiple helpers. Those helpers came in the form of my brother, dad and friends. My dad and brother did the dirty work of figuring out some fascia mounting solutions that I had been actively ignoring. Most importantly from a teamwork and labor standpoint, my wife became fully engaged in the effort – planning and working on items completely independently of whatever I was doing (this was a big deal since I am not a natural delegator!).
This all led to a remarkable (for a Goodman) work sprint in the month of May and early June in which all goals were met or exceeded. The work is documented in the following video.
Most importantly, trains ran flawlessly for four hours on tour day! One fully scenicked farm scene (with figures) and two partially scenicked areas added visual interest for our visitors and the fascia and skirting added a finished look. During the pre-tour (for other homeowners on the tour and volunteers) the day before the public tour, I even heard a few gasps of surprise when people entered the basement. Two of the organizers that had seen the basement only three months before were frankly astounded – proof that they were being overly polite during that earlier visit! Compared to even a month prior, the basement was was engaging, organized and VERY tidy!
The visitors were a wide spectrum of people, of which all showed at least a passing interest in the railroad, and a large percentage were fascinated by it. Everyone loves miniatures – they can trigger your imagination to take you to a different place, time and reality. I suspect there were at least a couple of visitors that are now potential hobbyists!
Many years ago, I bought Joe Fugate’s well-done video series about the construction of his Siskiyou layout. The section on Masonite spline roadbed convinced be to try the method. Having built several plywood cookie-cutter layouts over time, I was ready to try something different.
Before starting construction of my current layout, I was further influenced by another modeler who was also a proponent of using spline – but his material of choice was Homasote. His reasoning was logical and applicable to my way of doing things.
The advantages of spline in my way of thinking is three-fold; it produces natural vertical and horizontal curves, there is little waste of material (a flat sheet of material can be turned into any roadbed shape; straight or curves) and the subroadbed is also the roadbed (if using the solid spline method) The key selling point of Homasote is the ability to assemble it with screws; important to me since I tend to do a lot of revisions. Screw assembly means disassembly and reassembly when one’s mind changes…
Over the past two years I’ve laid about 150 feet of this roadbed – about 220 if double tracked sections are included – and I thought it was about time to share the process via some time lapse videos I’ve accumulated over the past year. It won’t necessarily show specific details, but will give viewers a good sense of what the build process looks like. All are narrated.
HomasoteSpline Cutting Fixture – Most Homaote questions revolve around the dust and how to cut it. This is a short video demonstrating both.
Layout Update 7 – Widening the roadbed to accommodate a second track through Circleville
Layout Update 11 – Double Tracking South of Circleville – More widening – this time to provide for a continuous running track through an area that was initially planned a single track. Does a good job of showing the use of different length screws and bending without breaking.
Layout Update 12 – Gluing Spline – Part of the double tracked section will later be cut out for a bridge. I glued the splines through this section so that it later be cut without any surprises.
Layout Update 13 – Bypass Construction – 11/20/16 – Construction of the bypass that completes all roadbed needed for continuous running. Shows the speed and ease of constructing longer sections of relatively straight roadbed.
As is obvious by the video titles, these are effectively a video layout blog. Though they weren’t recorded with that in mind, it turned out to be a useful side effect. Enjoy the cheap entertainment – and questions welcome.